This page is designed to provide you with a thorough and comprehensive setup guide for NDEVR’s API. Feel free to follow the instructions outlined on this page or download the guide for offline reference here.
2023 NDEVR, LLC. All Rights Reserved. Except as otherwise permitted by NDEVR, LLC., this publication, or parts thereof, may not be reproduced in any form, by any method, or for any purpose. Certain materials included in this publication are reprinted with the permission of the copyright holder.
NDEVR API License Subject to the terms of the Enterprise+ Agreement, NDEVR hereby grants Licensee a limited, non-exclusive, non-transferable, royalty-free license (without the right to sublicense) to use the API society solely for the purpose of the Licensee’s internal development efforts to develop applications for which the API was provided.
Disclaimer THIS PUBLICATION AND THE INFORMATION CONTAINED HEREIN IS MADE AVAILABLE BY NDEVR, LLC. “AS IS”. NDEVR, LLC. DISCLAIMS ALL WARRANTIES, EITHER EXPRESS OR IMPLIED, INCLUDING BUT NOT LIMITED TO ANY IMPLIED WARRANTIES OF MERCHANTABILITY OR FITNESS FOR A PARTICULAR PURPOSE REGARDING THESE MATERIALS.
NDEVR Software Links and Credentials
This information should be supplied by a staff member to assist you through the installation procedure below. If you do not have this information, please contact tyler.parke@ndevr.org.
API Git Information NDEVR Source Address https://git-codecommit.us-east-2.amazonaws.com/v1/repos/NDEVR_API
(Other repos may be provided see email)
Git Username *This should be provided to you in an email.
Git Password *This should be provided to you in an email.
Setting Up the Environment
This chapter will guide you through installing and configuring the following software components: Visual Studio 2022, Qt 6.5.x, Qt Visual Studio Tools, and Vulkan SDK. Each step is essential, so please follow carefully and review all instructions.
Visual Studio 2022
This project and its binaries are built and tested primarily using Visual Studio 2022; therefore, we strongly recommend this IDE.
Note that this section may be skipped if you already have Visual Studio 2022 installed or intend to use a different development environment.
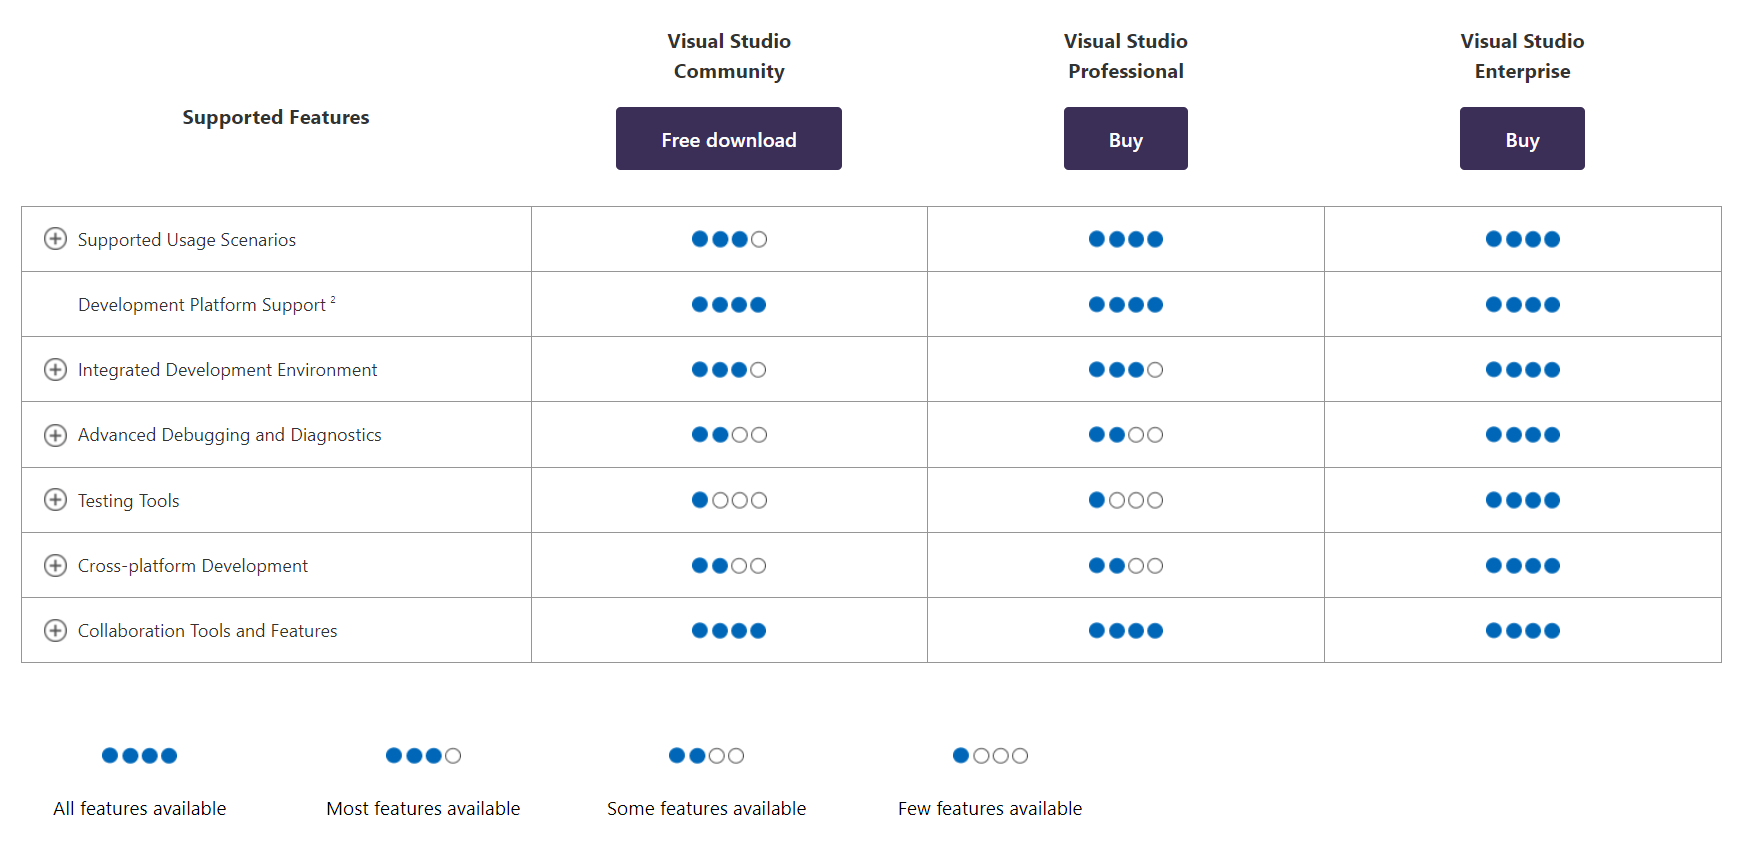
Select the edition of your choice. If you are unsure of which edition is right for you, see this Visual Studio Editions page. For the free edition, select Visual Studio Community.
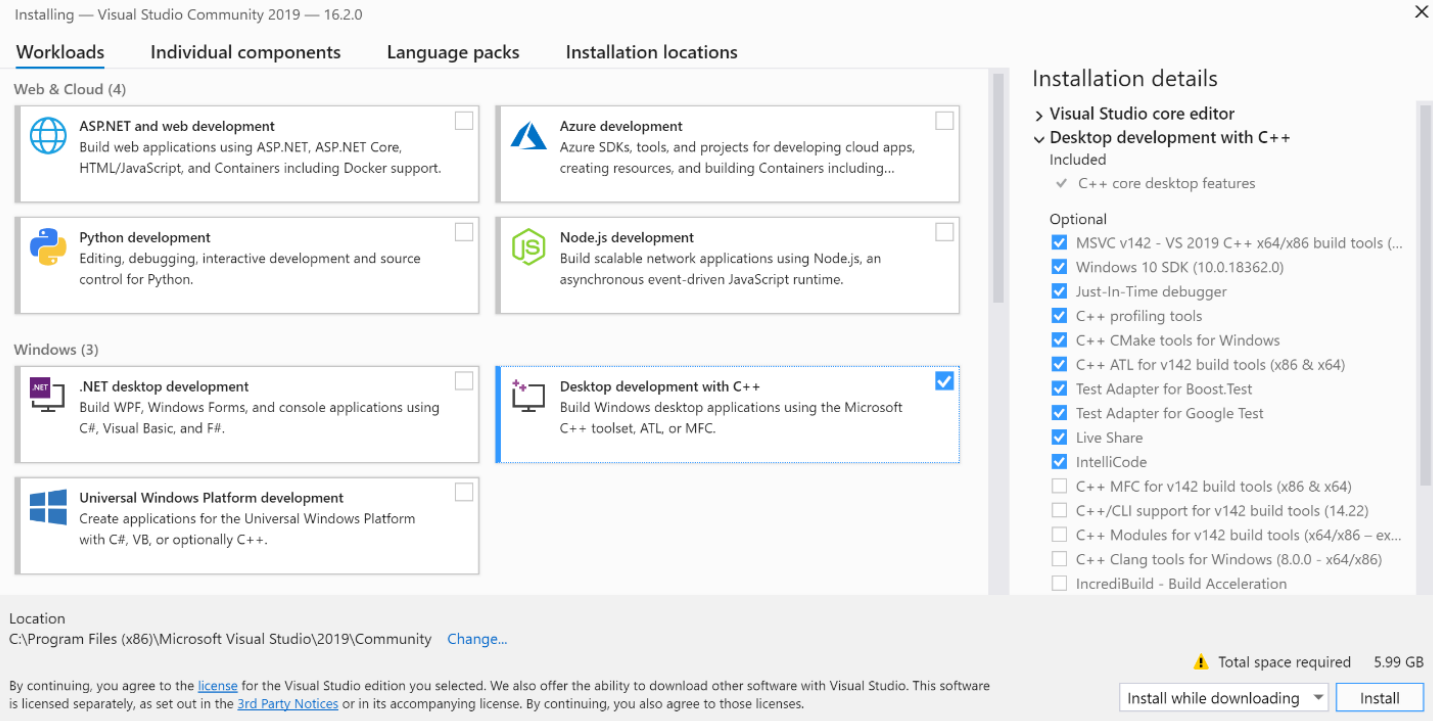
Begin running the installer, and follow the on-screen steps until prompted to select installation items. When prompted, select “Desktop development with C++”.
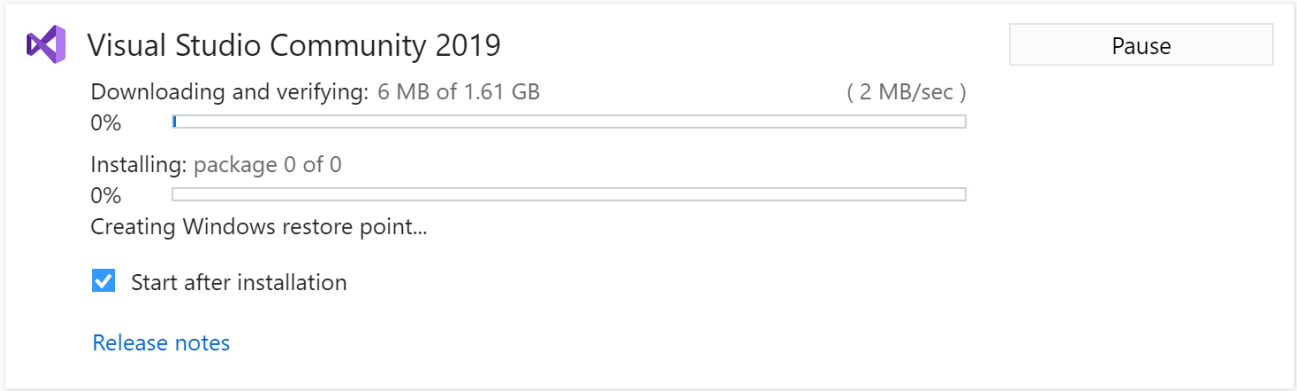
Select “Install” in the bottom right corner to begin the installation. Once the installation is complete, restart your PC.
Qt 6.5.x
The NDEVR API uses Qt as its base UI toolset. This project is built and tested primarily using Qt 6.5.x. The binaries are created using these headers and libraries, making this particular version required to guarantee a successful build.
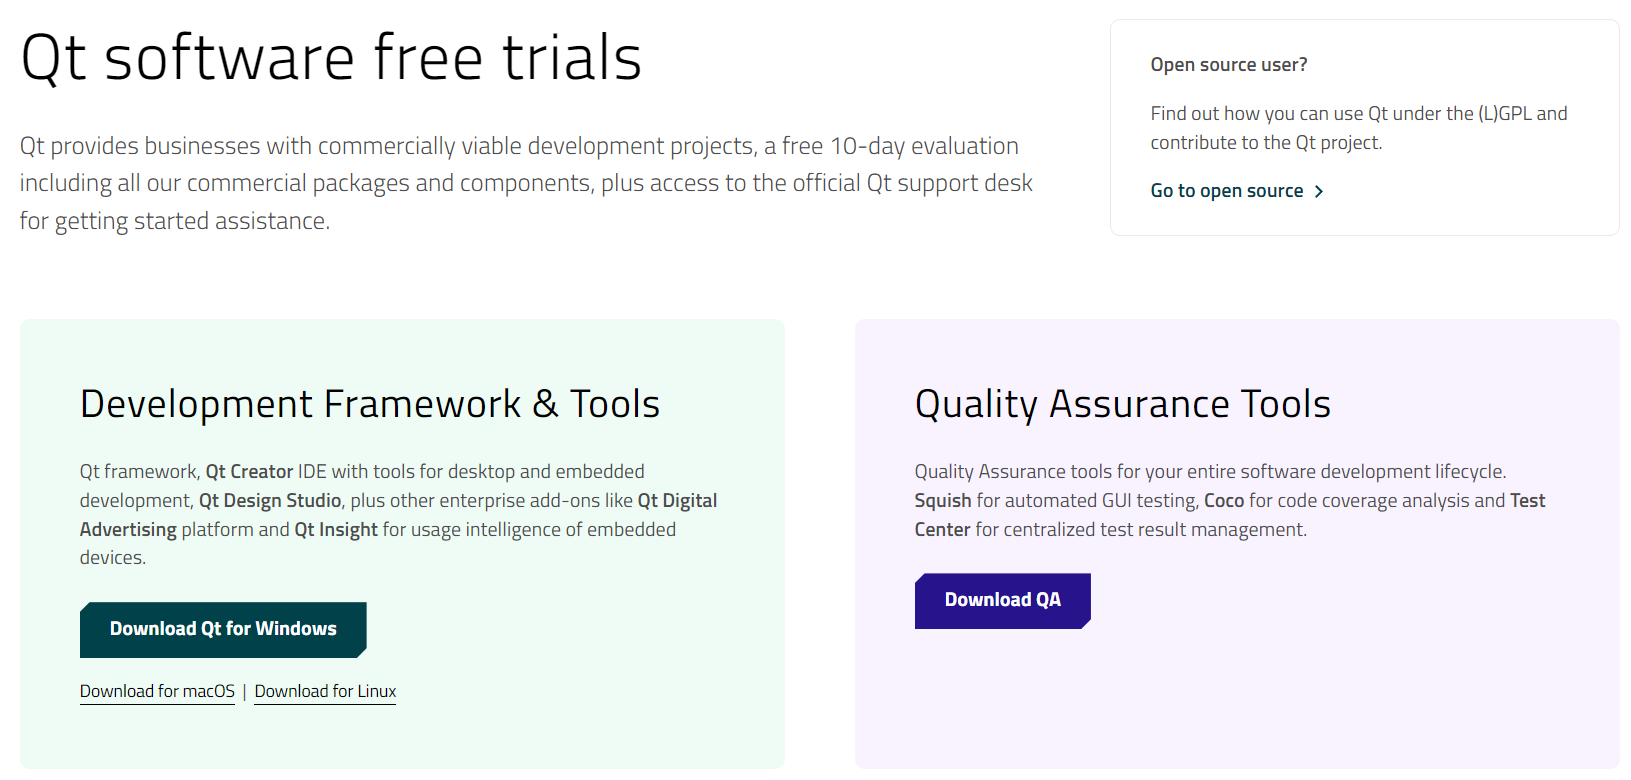
Go to this Qt Software page and select a Qt Version to download. Unless you intend to pay for Qt services, select the “Go to open source” option in the top right corner of the page.
If prompted, choose “Download” to download the Qt Unified Online installer.
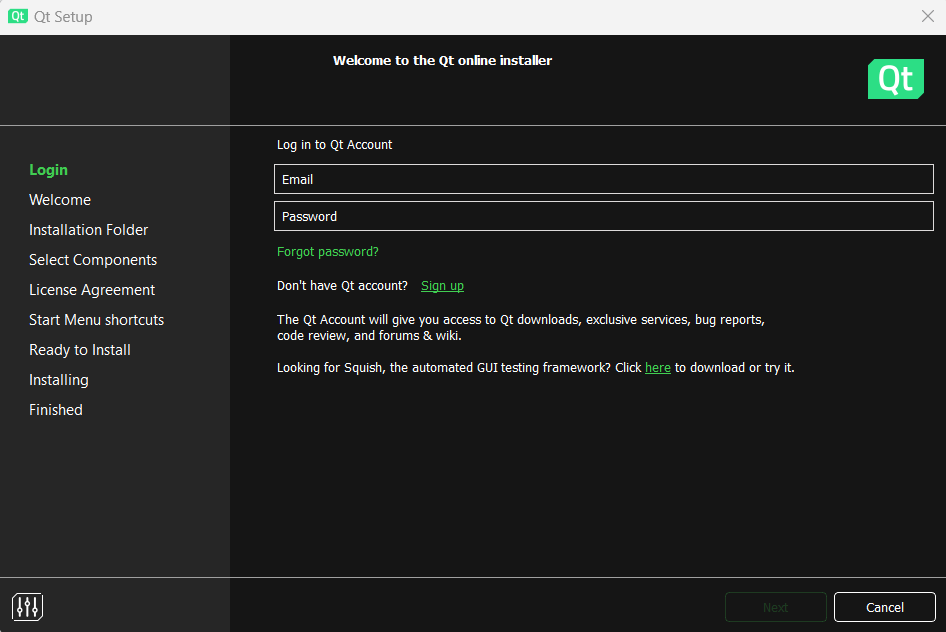
Run the installer and log in, or create your Qt account.
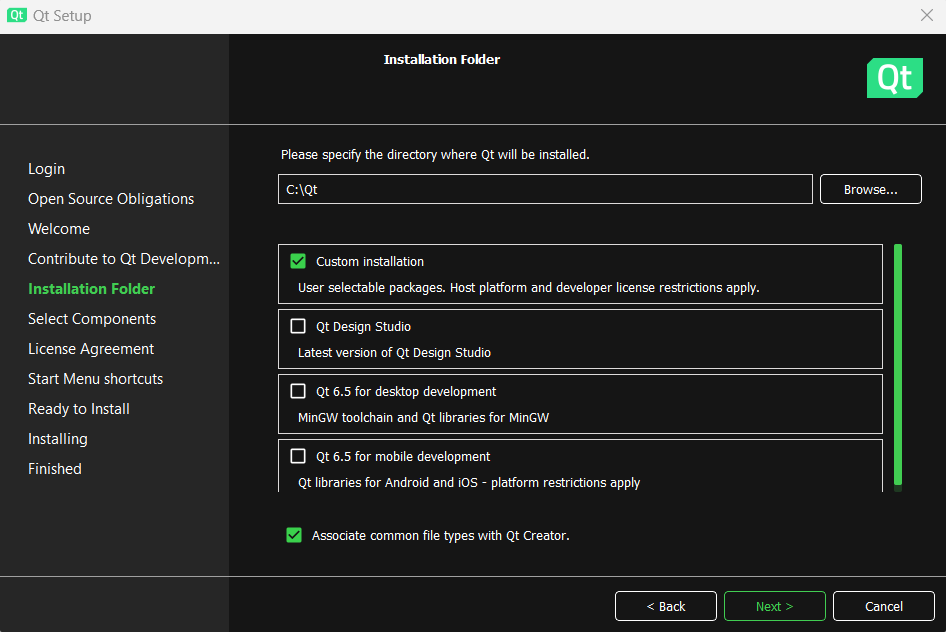
Proceed through the dialogs until prompted to “Installation Folder”. Select Custom Installation and specify an appropriate folder.
You may use any folder, but it is recommended to use C:\Source\NDEVR\ if you have no preferences, as this will be the path referenced in this guide.
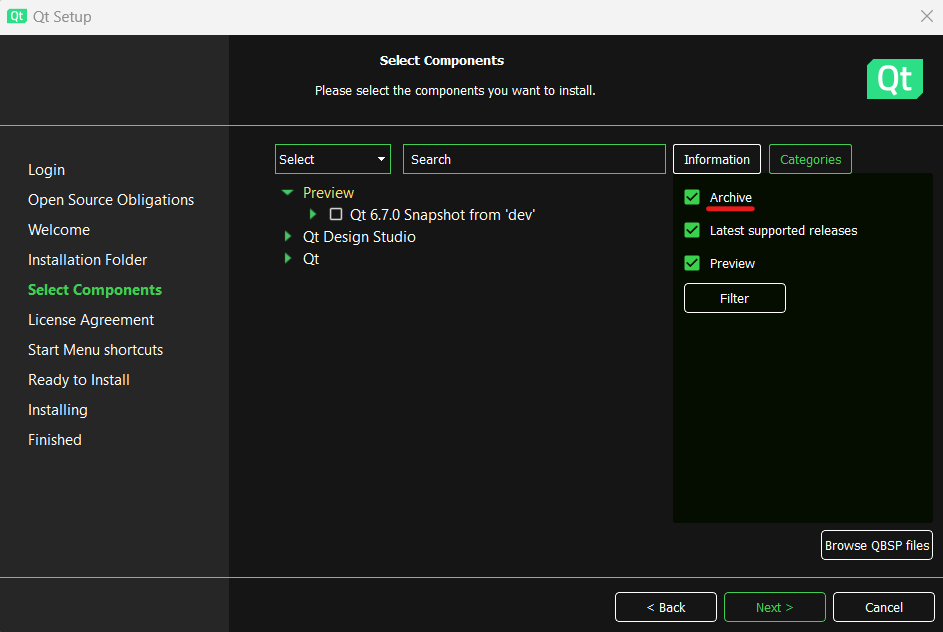
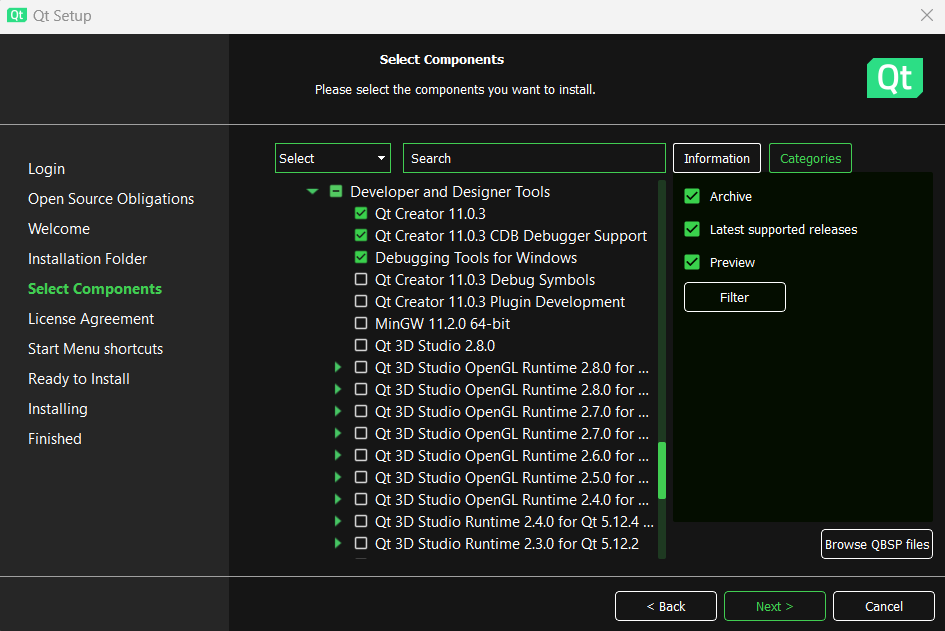
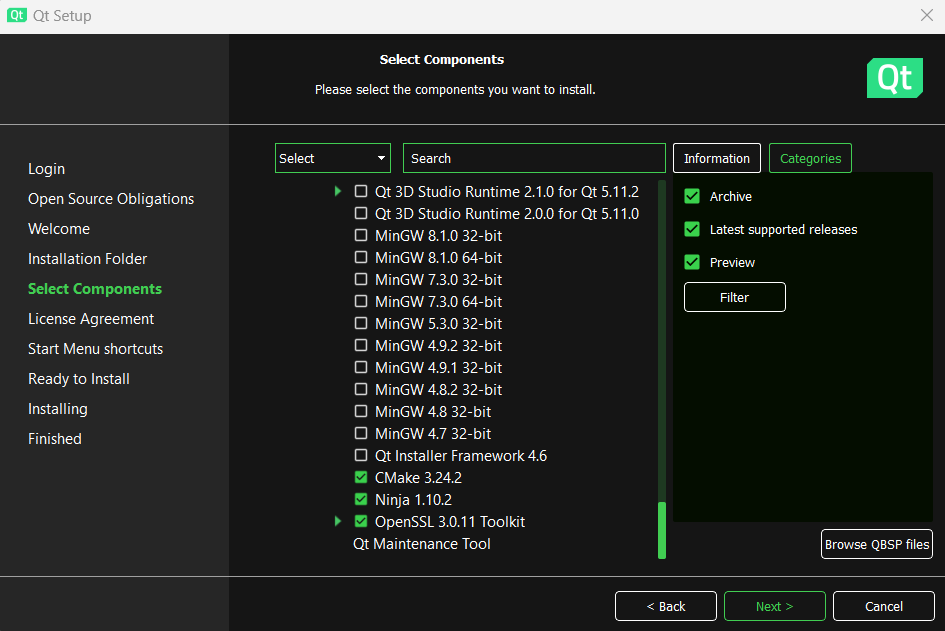
If you want to use a version other than the 6.5 long term support, when prompted to “Select Components”, choose “Archive” from the right side. Then, click the “Filter” button and wait. You will now have more versions of Qt available.
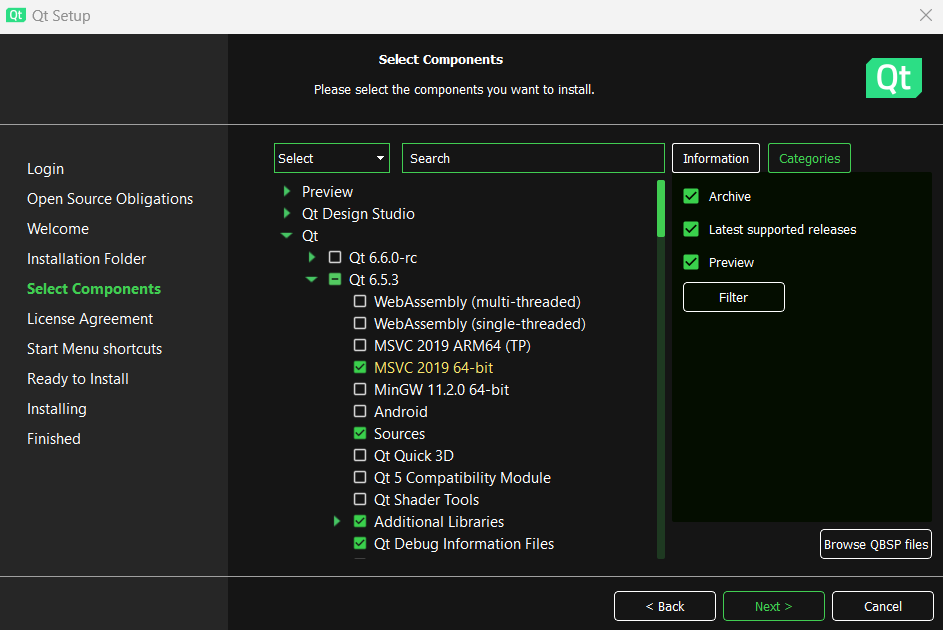
Dropdown Qt -> Qt 6.5.x. and select “MSVC 2019 64-bit”, “Sources”, “Additional Libraries”, and “Qt Debug Information Files”.
Do NOT press the “Next” button yet.
Lastly, scroll to the bottom of the list and dropdown Developer and Designer Tools. Select the latest edition of the “OpenSSL Toolkit”.
You do not need to select any other options; the images below are taken for comparison purposes.
Now, press the “Next” button. Continue with the rest of the installation. Note the installation may take several hours or appear to be frozen; nevertheless, it will complete.
Qt Visual Studio Tools
In order to ensure ease of use within the Visual Studio environment, it is highly recommended that you download Qt Tools for Visual Studio. Specific instructions in this manual may assume you have this tool.
Be sure Visual Studio is not running prior to installing.
Run the installer to add the extension.
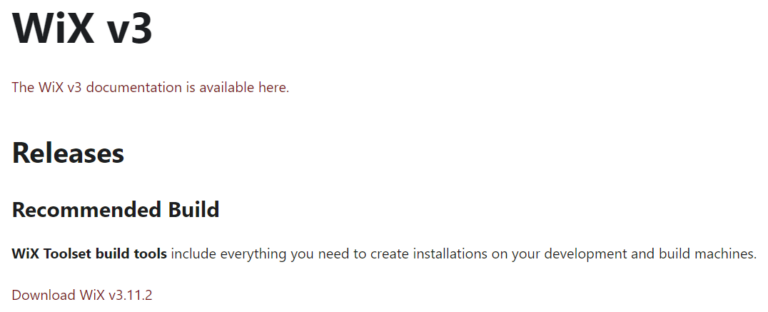
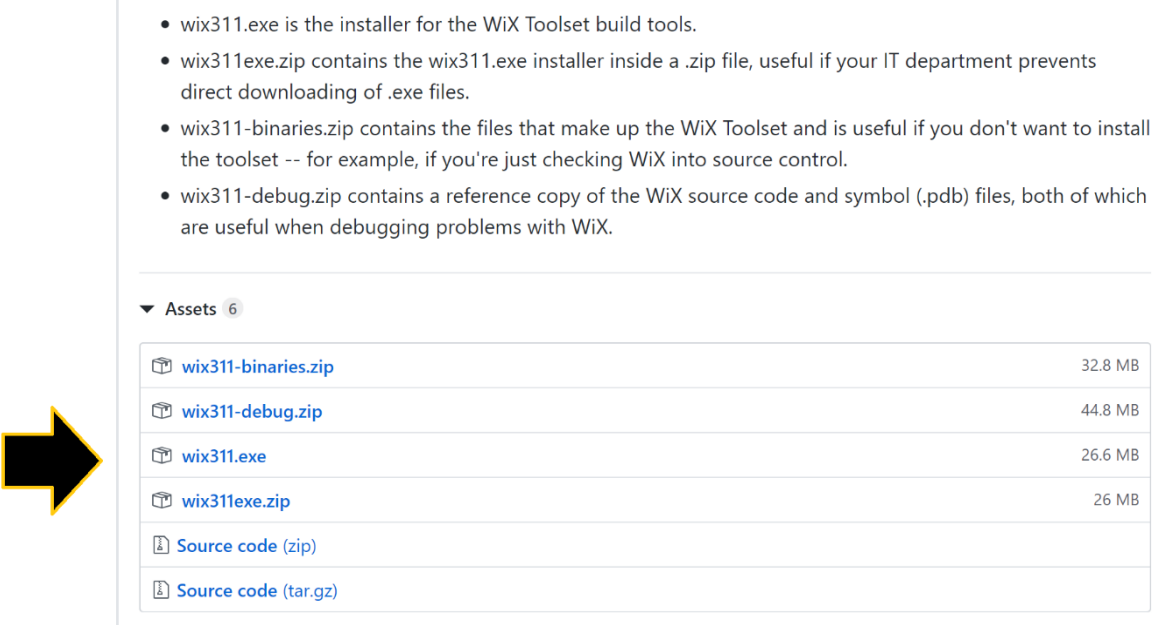
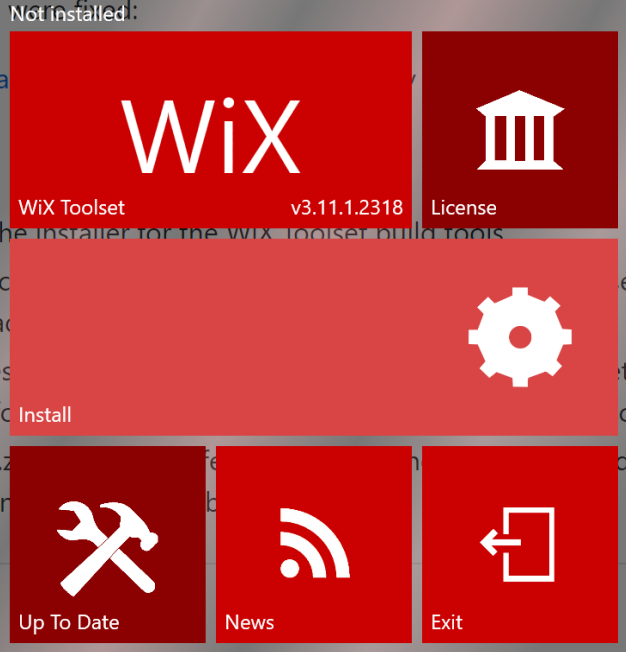
WiX Toolset for Visual Studio 2022
NDEVR Applications typically use WiX to manage the .exe and installation process. WiX, among other programs, allows for the customization of MSI installation files and bootstrappers. MSI files tend to be the preferred choice for IT personnel, whereas the bootstrappers allow us to package the MSI with third-party prerequisite programs needed for installation, as well as provide more custom build steps.
Ensure Visual Studio is closed. Run the VSIX extension file to add the extension to Visual Studio. Select “Install” when prompted.
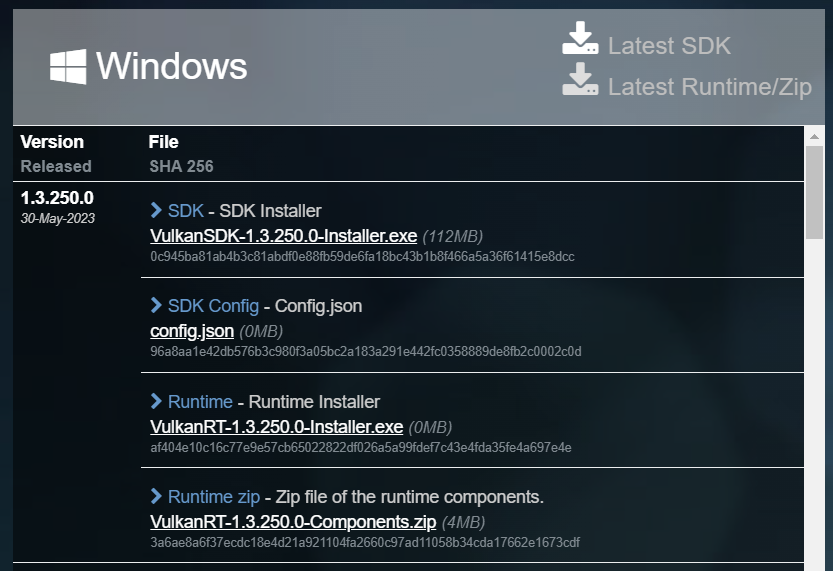
Vulkan SDK
Vulkan SDK is a high-performance 3D graphical application offering efficiency and convenience to NDEVR’s toolset.
Go to this Vulkan page and download the latest SDK Installer for Vulkan SDK.
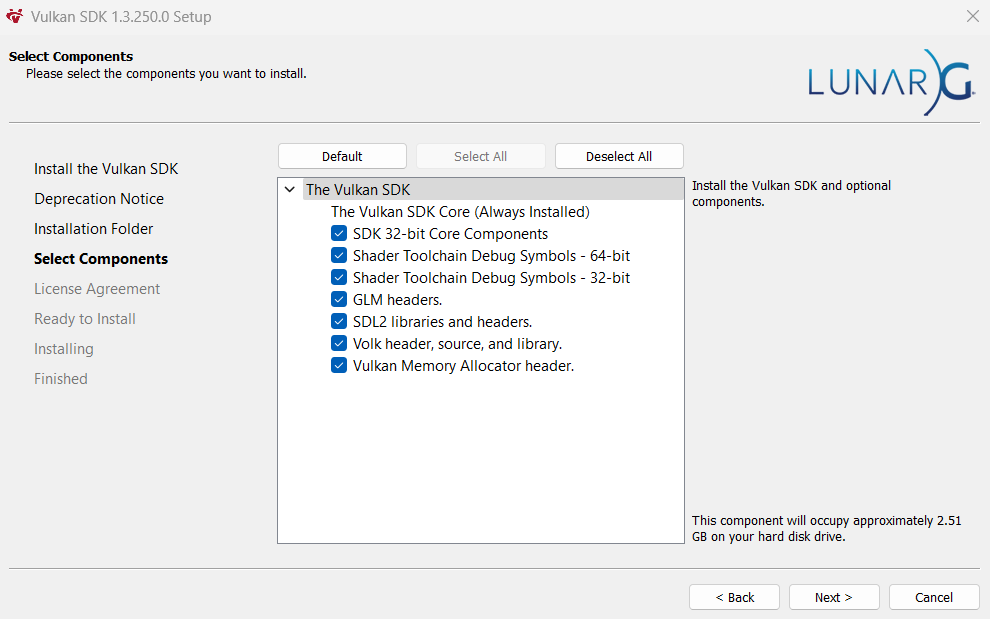
Follow the installation procedure. At Select Components, be sure to select ALL of the components available.
Complete the installation. Vulkan SDK will be pathed properly in Chapter 3.
Checking Out the Code
This chapter will cover setting up user credentials and observing the NDEVR API. It is assumed that all of the steps in Chapter 1 have been completed; specifically, the installation of Visual Studio 2022 and AWS Tools for Visual Studio.
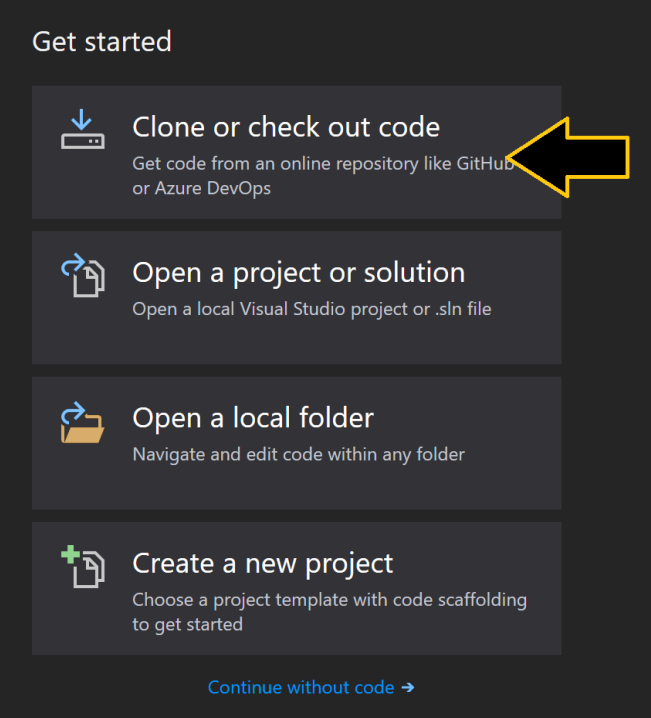
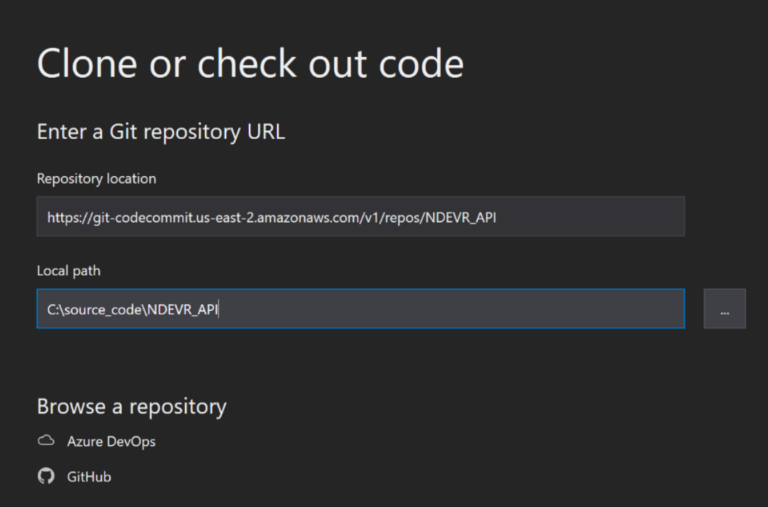
Open Visual Studio 2022 and, in the initial startup, choose to “clone or check out code”.
Enter the NDEVR Source Address (also given under “NDEVR Software Links and Credentials” toward the top of this page) into the Repository Location.
Choose a Local Path.
You may use any folder, but it is important to remember this path as it will be used in Chapter 3 of this guide for setting up your Visual Studio environment.
It is recommended that this local path is in a new folder (such as “C:\NDEVR”) to avoid the issue of path length limitation.
Click “Clone” to download the source code from the repository.
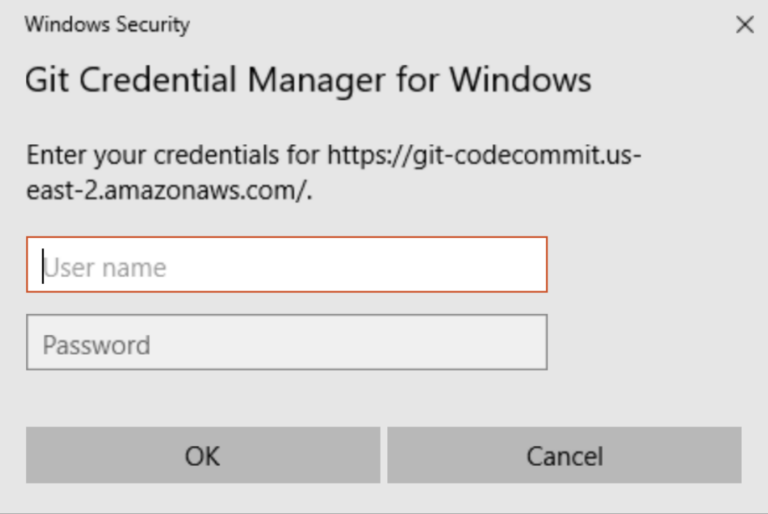
When prompted, enter your specific Git credentials (provided by NDEVR in an email).
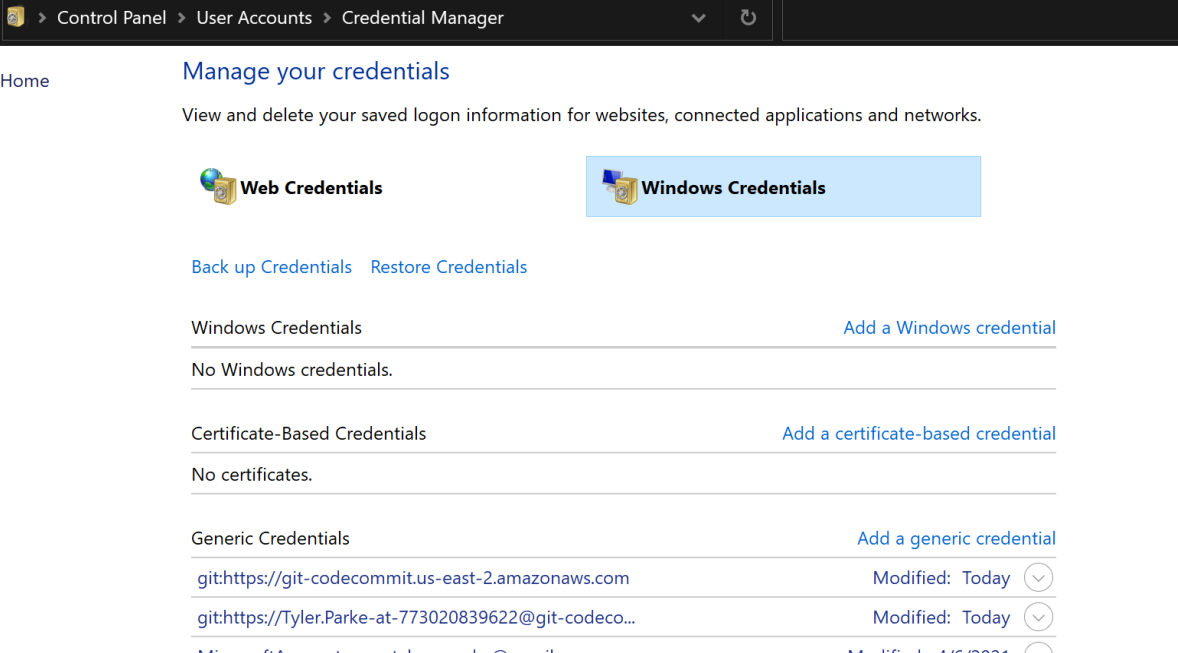
If you are not prompted for Git credentials, you may need to clear old credentials from Windows. Open Windows Credential manager to find and remove or modify relevant Git credentials. Afterward, repeat the above steps.
Code will begin downloading from the repository.
Note that this is an intensive process and may take over an hour.
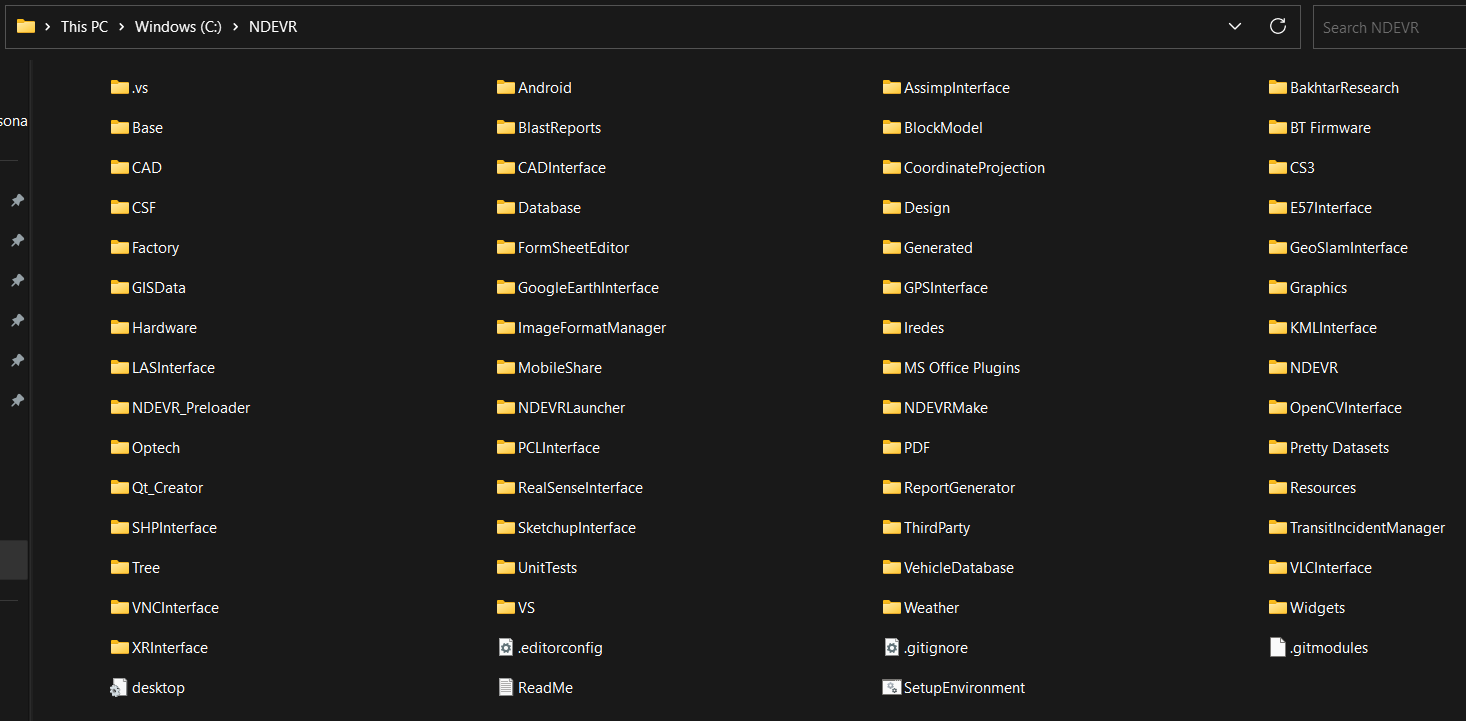
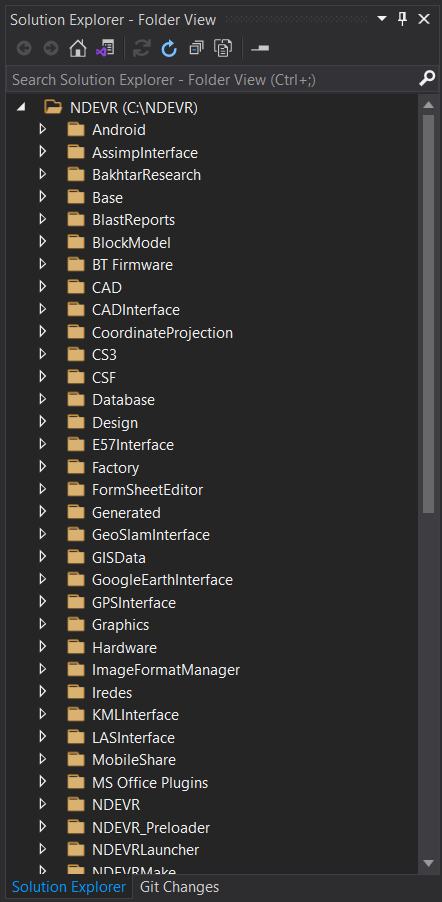
You should see the files below in your chosen local path, and the same files in the Solution Explorer the next time you open Visual Studio.
Close Visual Studio and navigate to your chosen folder where the API is stored, also shown above.
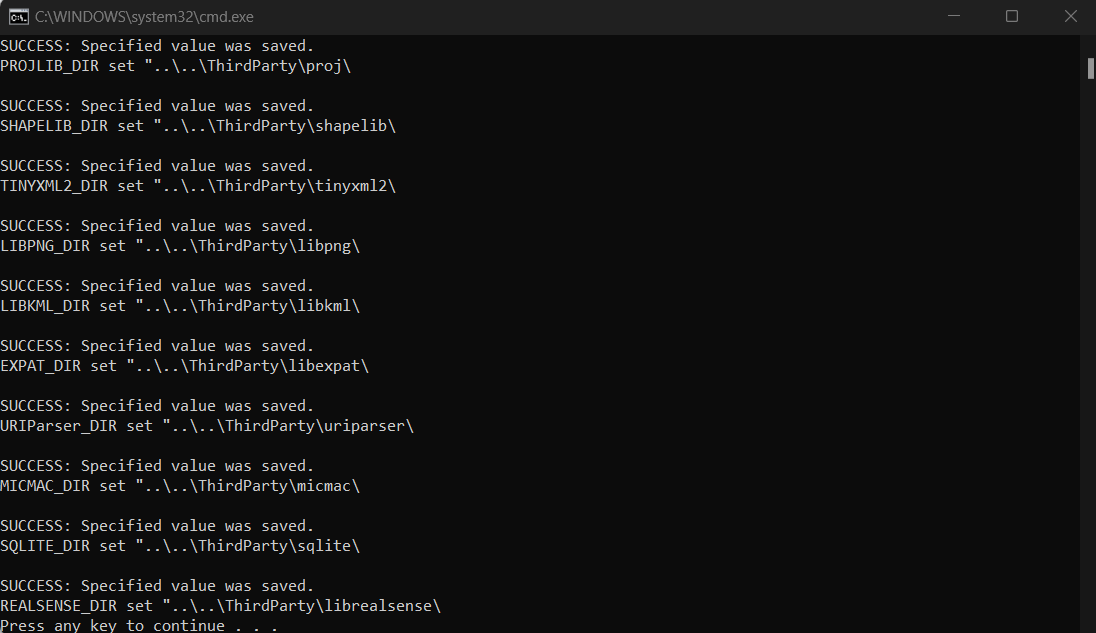
Read the “ReadMe.txt” file and follow all instructions to complete setting up the environmental variables for the NDEVR API environment.
In the same folder, you should find “SetupEnvironment.bat”. Run it, and it will initialize the files needed. Press any key to continue and close.
Repeat Steps 1-9 for any other NDEVR-related projects. Be sure to pay close attention to the “ReadMe.txt” file, as this file will have different instructions from library to library.
Open Visual Studio again and choose to build “NDEVRLauncher”. You are expected to encounter several errors (visible in the Error List panel at the bottom of Visual Studio), which will be debugged in the following chapter.
Note that your errors will likely not match those pictured.
Reassigning Directories
This chapter will resolve errors concerning resolving directory names. Note that this guide covers the two guaranteed errors you will encounter, but there may be others. Please contact NDEVR for any persisting issues.
Vulkan SDK Directory
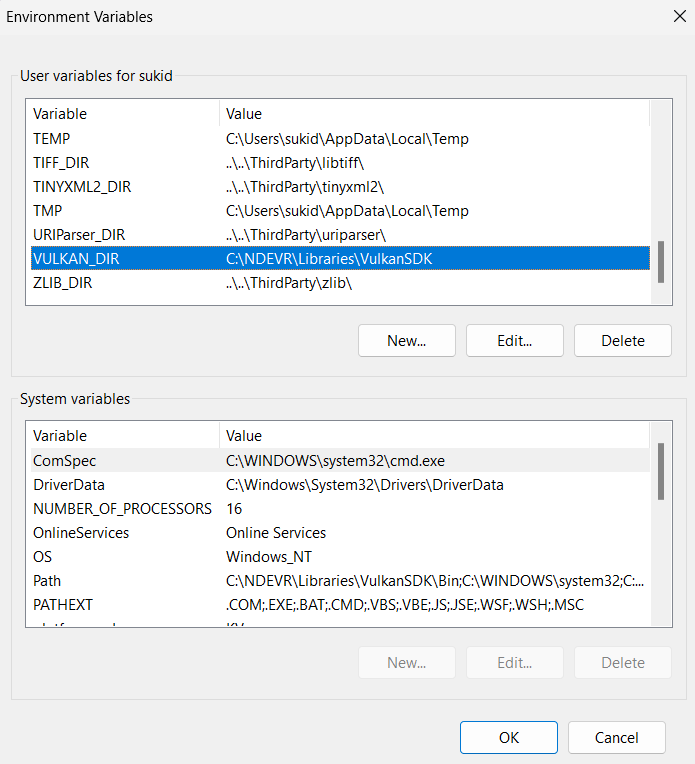
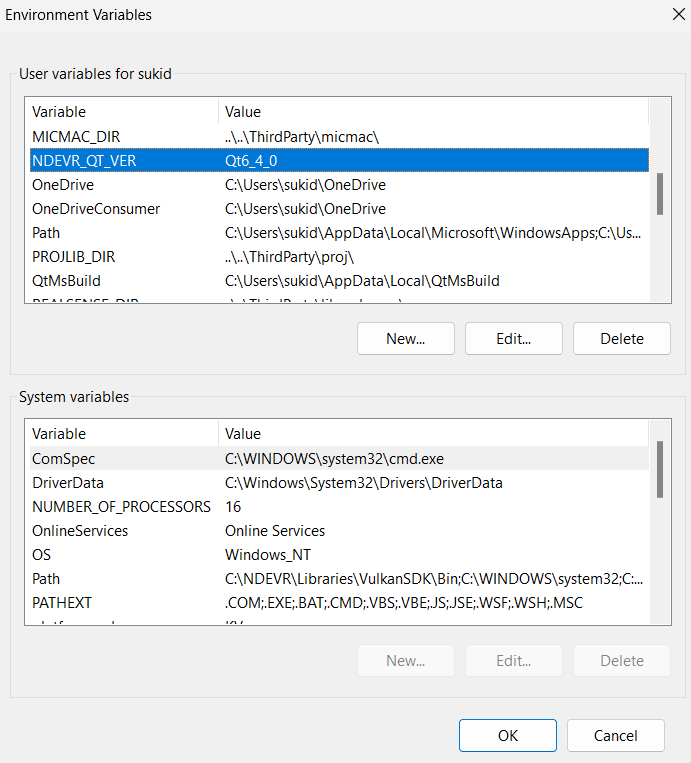
Close Visual Studio, search your device for “Edit environment variables for your account”, and open the program.
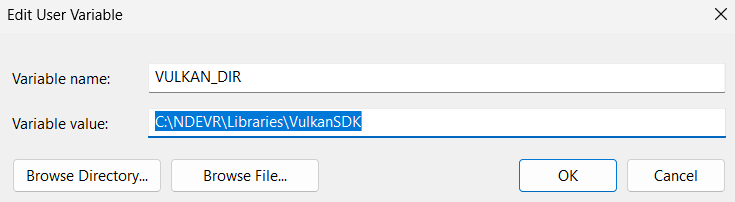
Under “User variables for [USER]”, scroll down to find “VULKAN_DIR” and click “Edit”.
Replace the “Variable value” with the same directory you assigned during the Vulkan SDK intsallation.
Press “OK” and return to the “Environment variables” page.
Qt Directory
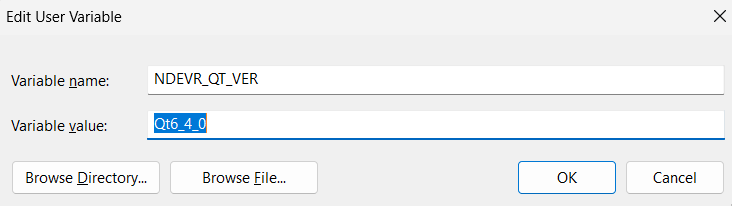
Continuing from the “Environment variables” page, scroll up to find “NDEVR_QT_VER” and click “Edit”.
Rename “Variable value” NOT with any directory, but with a recognizable name (such as “Qt6_5_4” or another representative title).
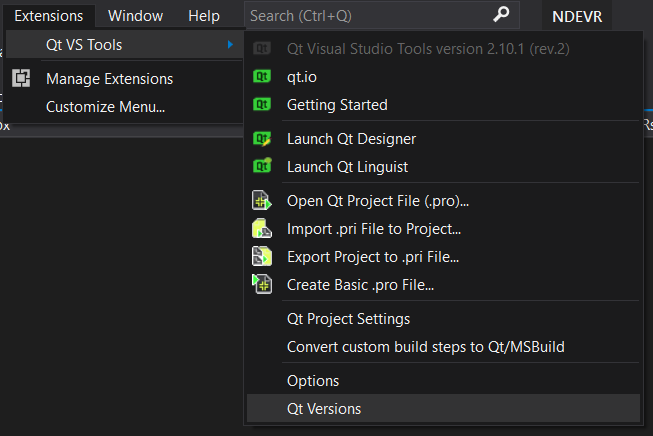
Open Visual Studio and navigate to Extensions -> Qt VS Tools -> Qt Versions at the top of the application.
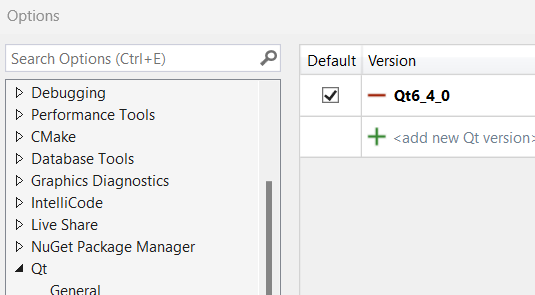
Go to Qt -> Versions and add a new Qt version with the same name from step 2. Copy that directory into the “path” box and press “OK”.
Restart Visual Studio and re-build the project.
Should any errors persist, please contact us at support@ndevr.org.
Congratulations!
Congratulations on finishing the API User Guide! You are now prepared to take on your next project. If you have not been assigned a new task yet, please reach out to NDEVR personnel. Otherwise, go ahead and start your next assignment.