Over time, most IMUs drift with use, temperature and small imperfections from the factory assembly process. Left uncorrected, that drift — together with tolerances in the camera assembly — makes it impossible to reliably place scans in the real world. To correct for both, a calibration tool is built directly into the software.
Gravity / IMU Calibration
To keep results accurate, re-calibrate the IMU against gravity every few months, or after 20 or more hours of use.
1. Start a new calibration
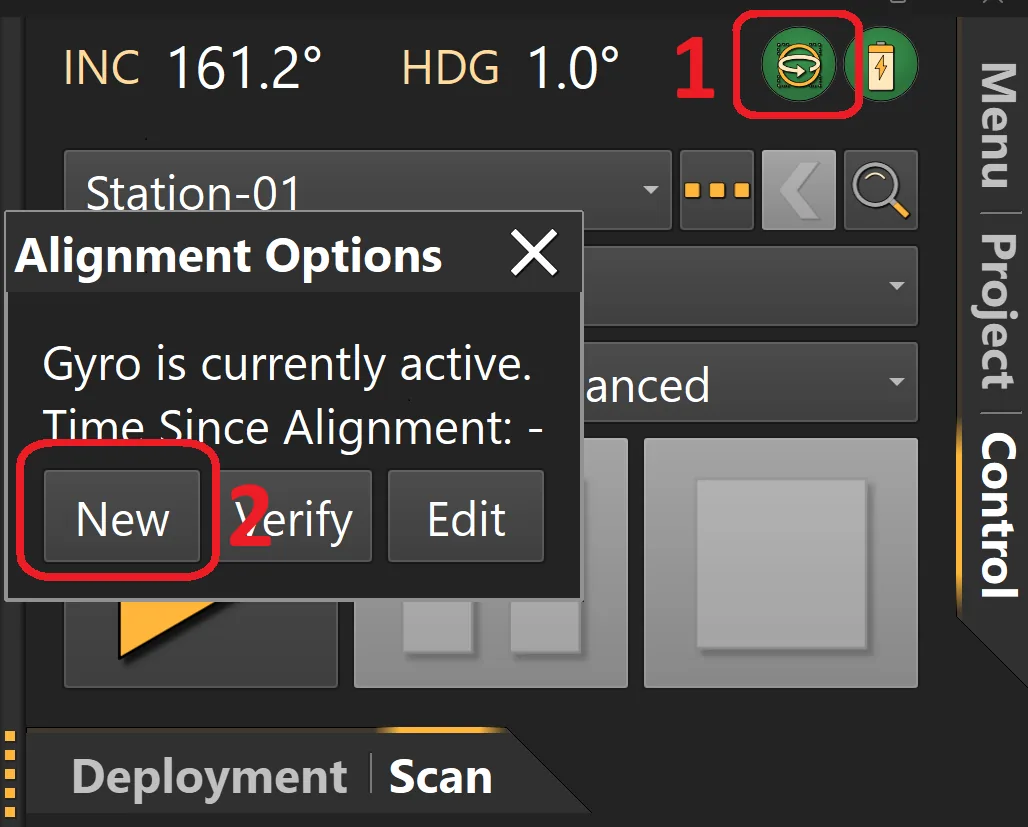
Connect to the scanner, open the Orientation menu at the top of the dialog, and choose New.
2. Begin capturing
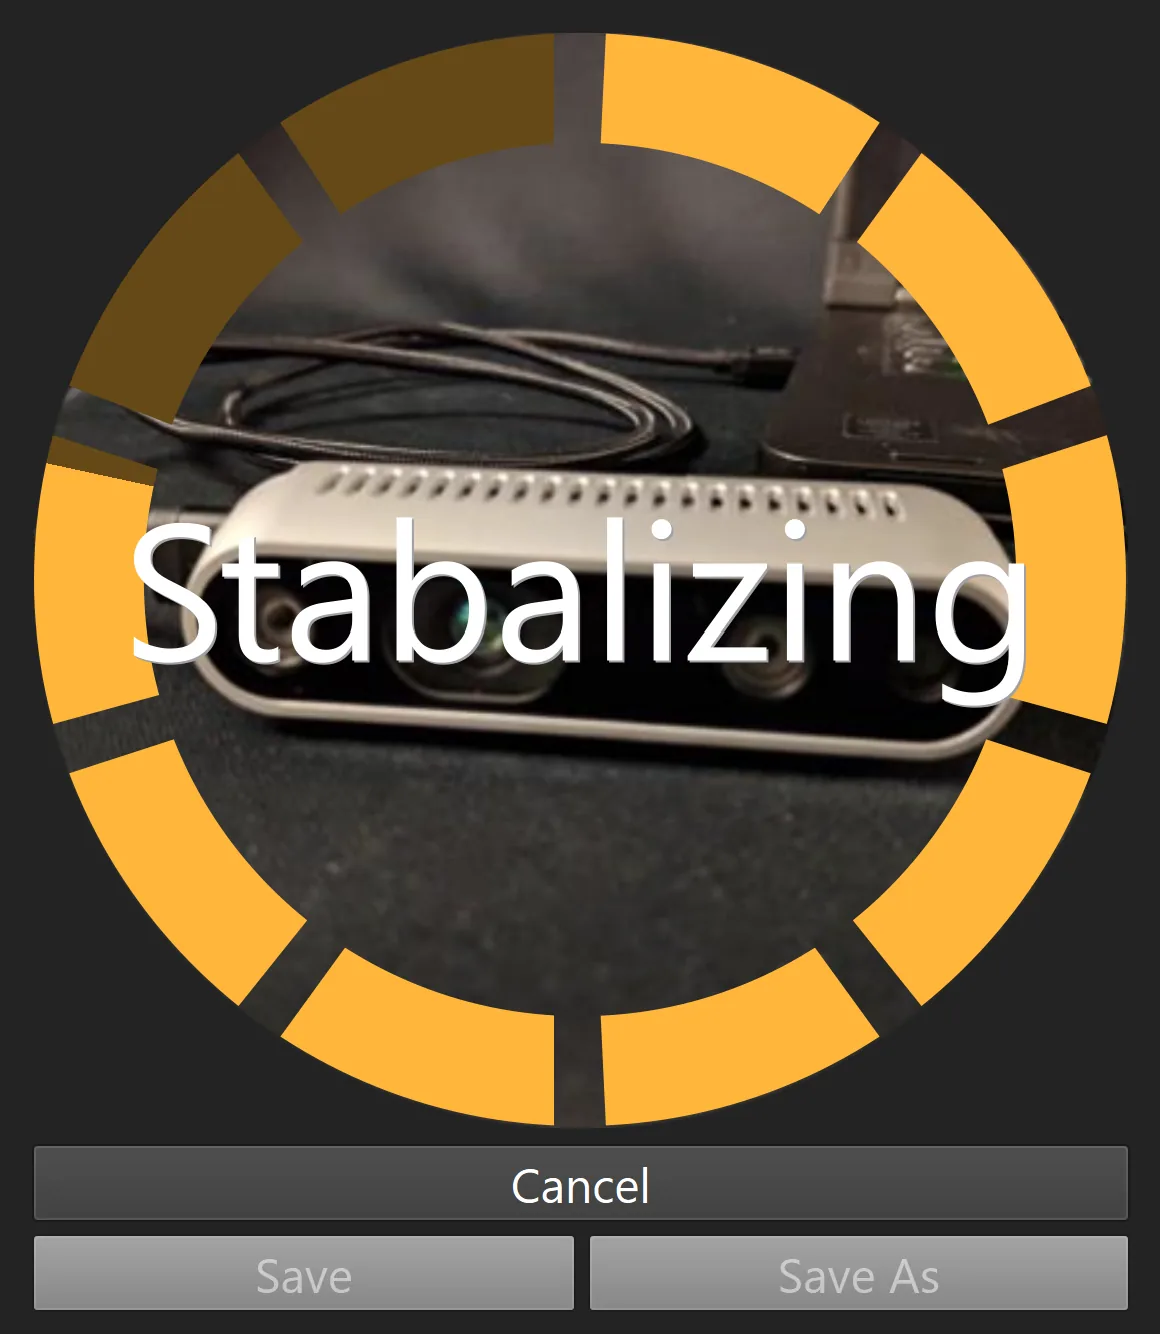
Press Start to begin. The software then prompts you to move the scanner through a series of orientations.

3. Hold each orientation
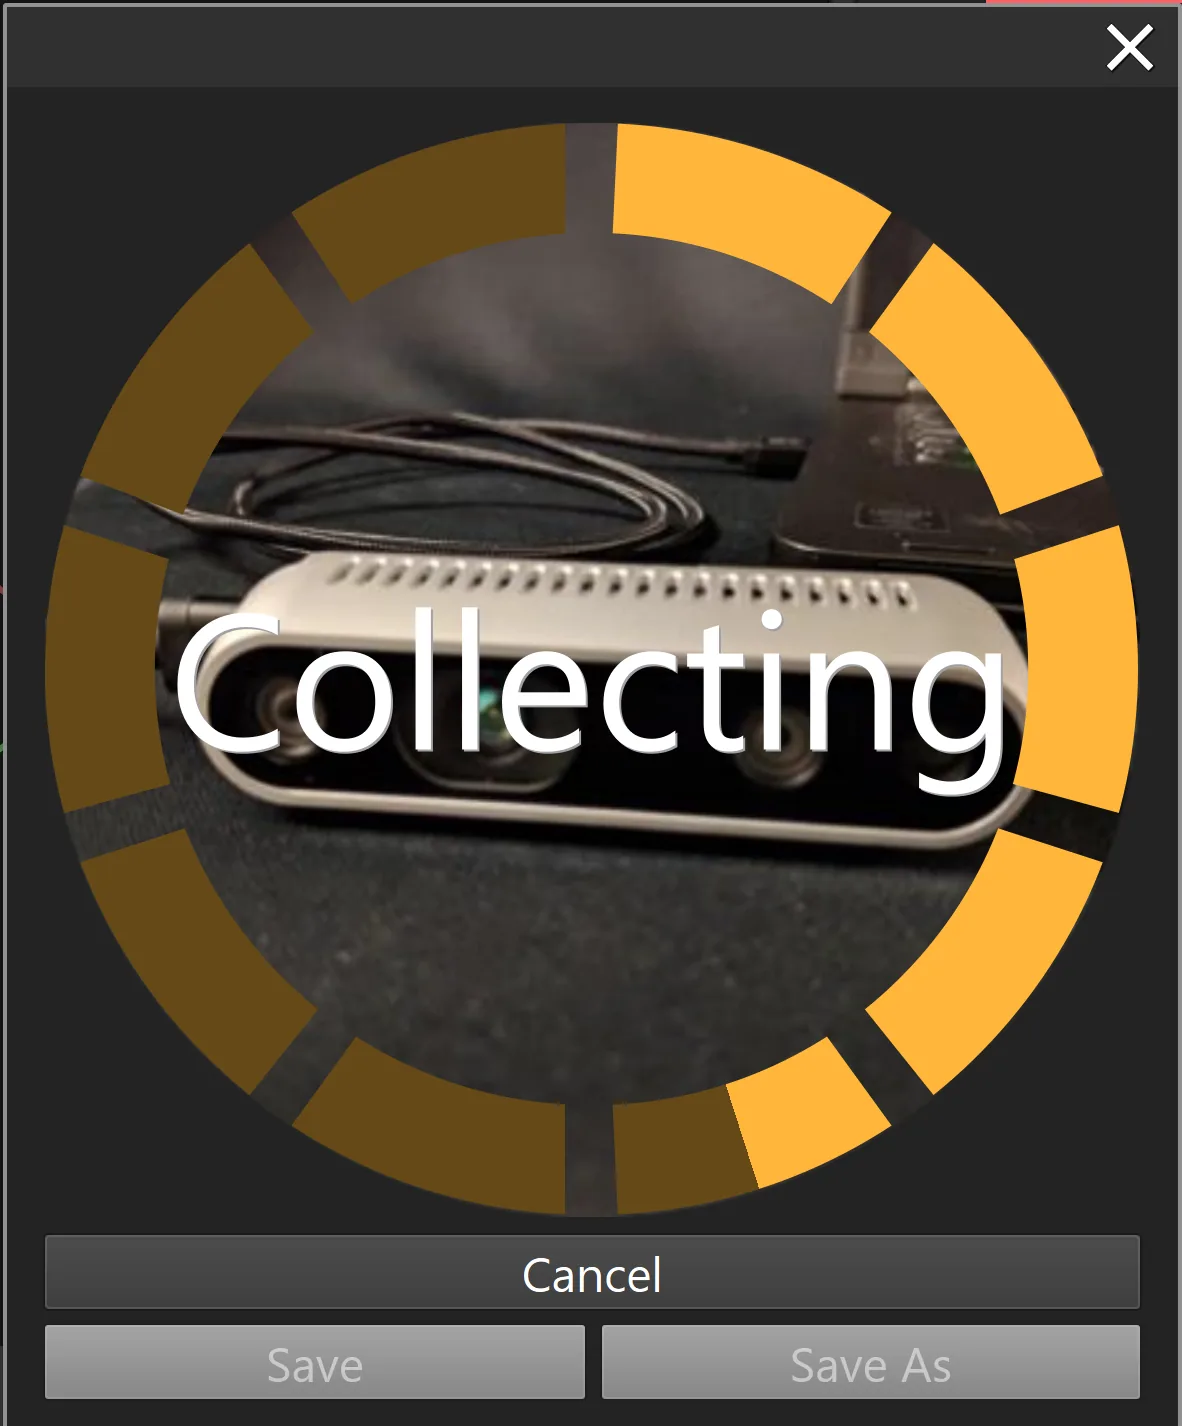
When a position is detected, the device stabilizes automatically and records its readings — just hold it steady.
4. Work through every orientation
Continue through the full sequence, keeping the orientation accurate at each step until the calibration completes.

Video / IMU Calibration
Once the IMU is tied to gravity, you can relate the calibrated sensor to the camera and correct for noise and factory misalignment. This only needs to be done once in the device’s lifetime — unless you fit new lenses or cameras.
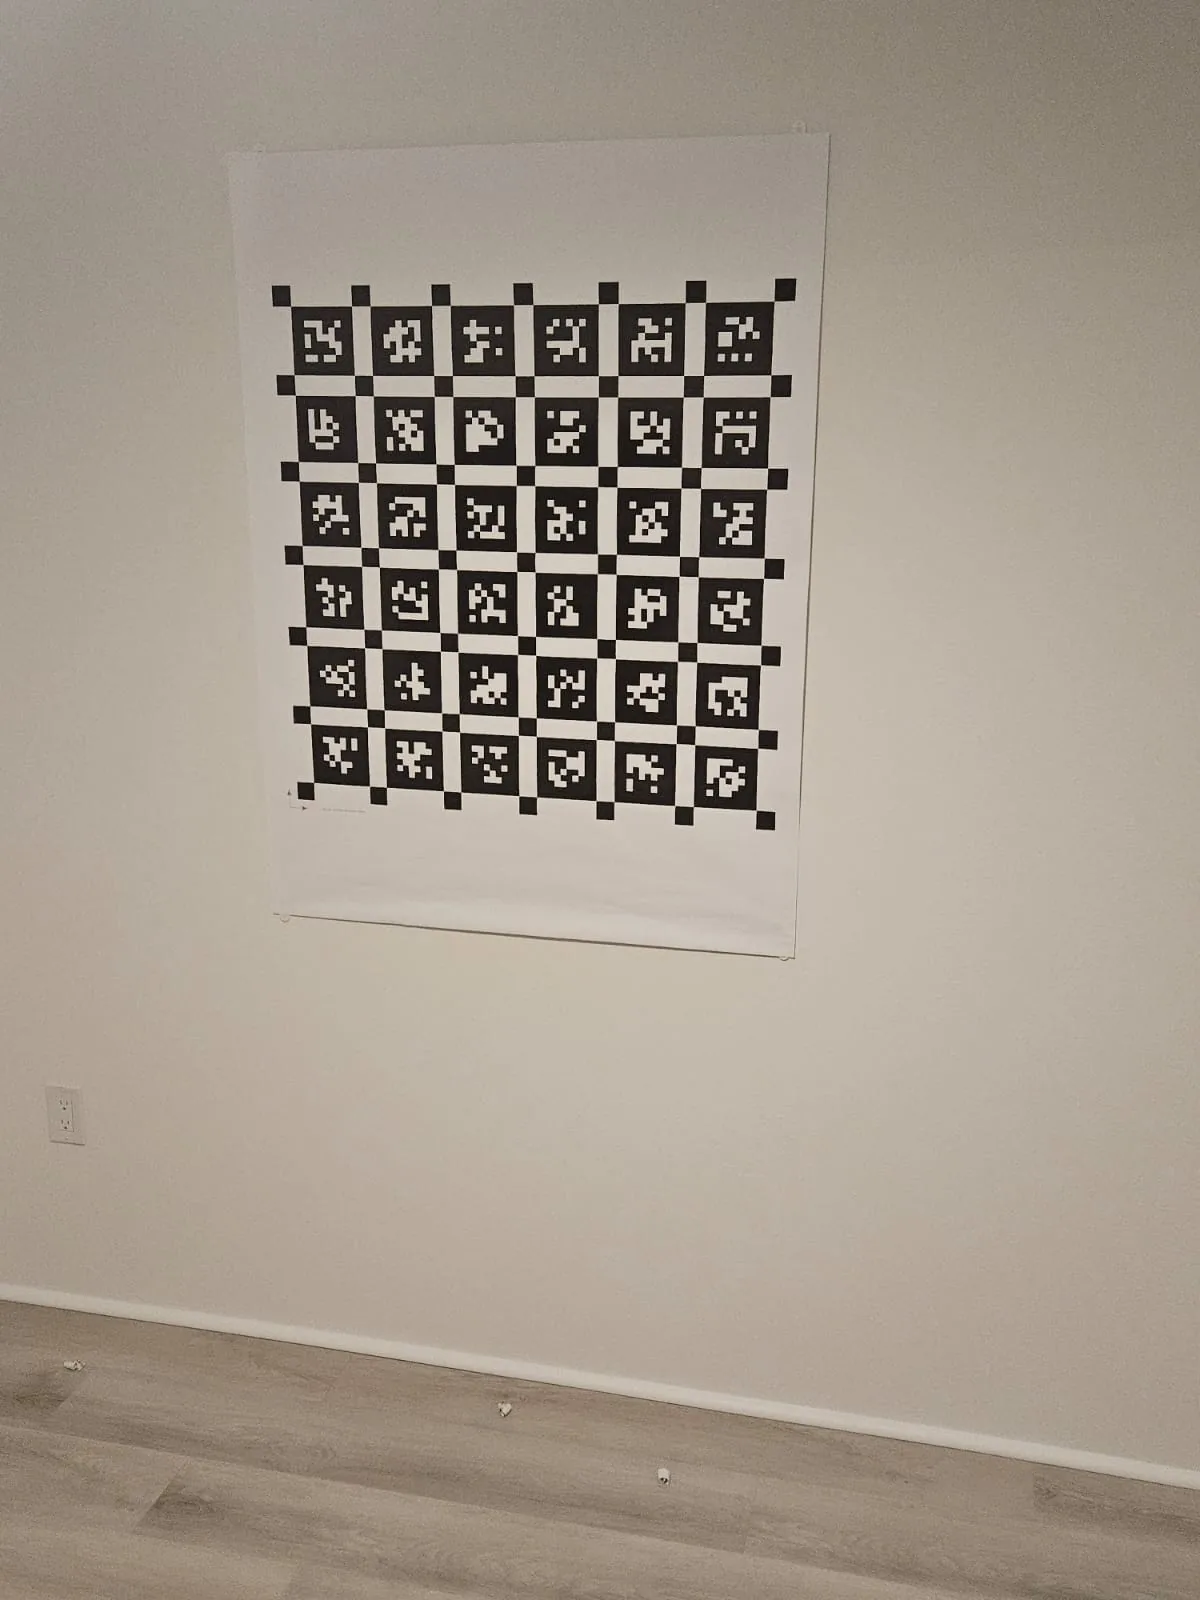
1. Print the calibration target
Download and print the April tag target. For best results, print it on A0 paper — large enough to allow movement while the camera stays focused on the image. Most print shops and major office-supply stores can handle a print this size. Hang the finished sheet flat against a plain wall.
2. Enable calibration
In the software, go to Settings › Scanner › Calibration and turn on Allow Calibration.
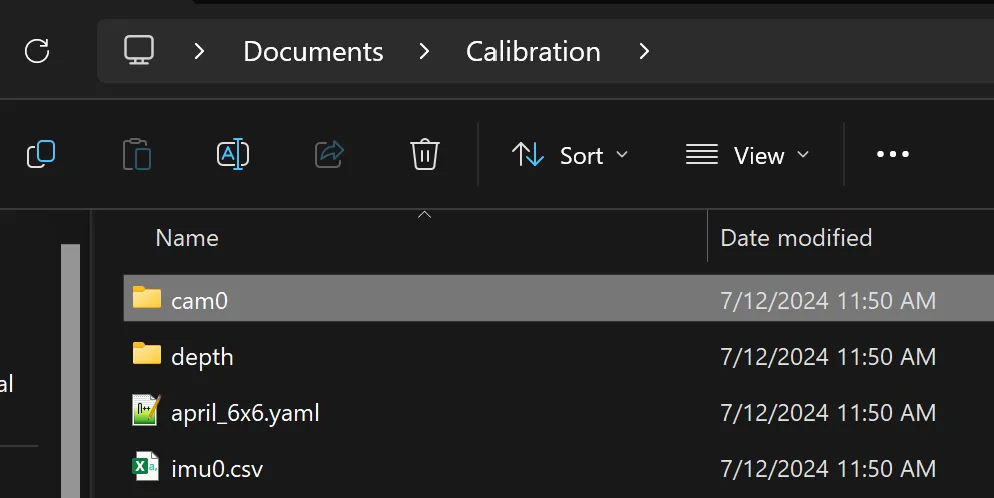
Choose an output location for the captured files. Pick a fast disk — roughly 30 images are saved every second, and a slow drive can reduce scan quality.
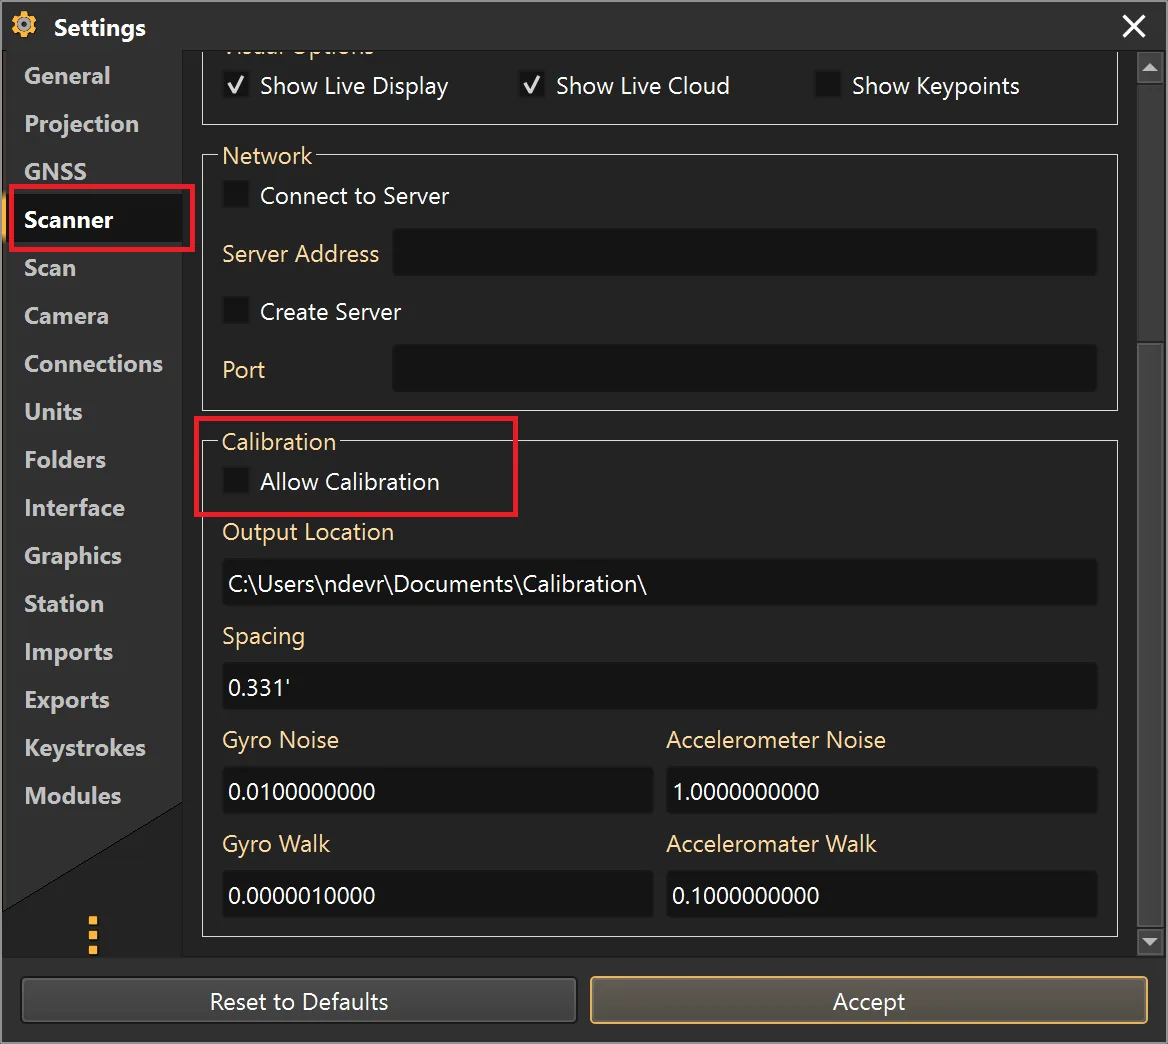
3. Enter the grid spacing
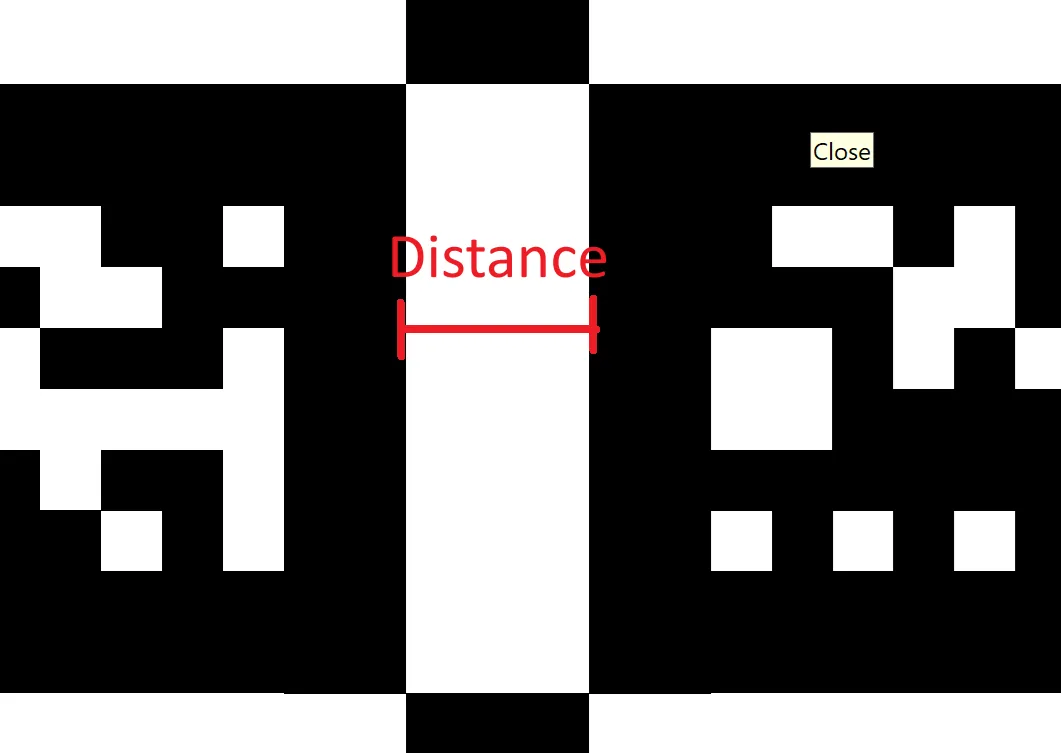
Measure the spacing between the April grid squares and enter it in the Spacing box. Leave the other values at their defaults unless advised otherwise.
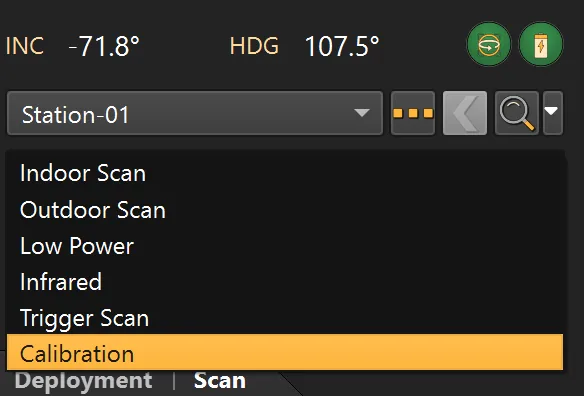
4. Run a calibration scan
Open the Scanner Control tab and start a Calibration scan.
5. Sweep the target
While the scan collects data, sweep the camera across the calibration target.
For a clean capture
- Excite every IMU axis — smoothly tilt and rotate the camera, and move it in and out.
- Avoid shocks, especially when picking up or setting down the sensor.
6. Submit your data
Go to the output location and confirm the images were saved. Zip the folder, then either email it to calibrations@ndevr.org or copy it to a USB drive and mail it to 21816 SE 280th St, Maple Valley.
Once we receive the data, allow 1–3 business days for processing. We’ll send back a calibration file along with simple instructions for loading it.